Friday, March 30, 2012

DIY Seedling Markers

 So when I purchased all the stuff to plant my seedlings I totally forgot to buy popsicle sticks or something to mark them. I was trying to think of a cute way to mark them without having to go out again or spend more money, when I thought about trying to do something cute with little bunting banners. I know its one of those cliche trends right now, but I thought it'd look nice. That's when I remember that I'm lazy, and I totally wasn't ready to commit to making small triangles for every letter, for every plant. So I decided a small banner would be cute. I used to scrapbook, so I have a bunch of card stock scraps, you know, the kind you can buy in a bag from Michael's for like $5. Perfect!


The first thing I did was pick out some colours that I liked. This image is from Design-Seeds (I unfortunately can't find the original link!), and I just love all the way these colours look together. It's definitely going to be the palette I plan on using outside. Luckily the card stock I had on hand matched this nicely.


Gather your supplies. For this project you'll need:
  • Pen/Pencil
  • Card Stock
  • Dirty Scissors. Or clean ones if you're fancy.
  • Measuring Tape
  • Toothpicks
  • Hot Glue Gun (you could try Elmer's if you want. I originally used a small super glue tube thing, but it didn't hold at all)
  • Optional: Beer. I do most of my arts and crafts mildly intoxicated, and listening to the radio. I suppose it doesn't help with efficiency, but it definitely makes it more interesting.

Then I grabbed my peat cells to measure how much space is between the center of two cells. 2" was perfect.


This is the design I went with. Its basic, and sort of looks like a banner. I tried a few other shapes, and if you're artistic more power to you. This was the best one I made. I free handed it, so its not perfect, but I'm okay with that. You could also print a clip art banner from Word and trace it onto the card stock. I don't have any ink in mine...


Whatever you decide to do, make sure your design is a little longer than the space you need. This is so you have enough room to glue whatever will be holding your markers in the dirt.


For a little preview you can hold up your marker to see what it'd look like. This way you can tell if you've left enough room for your tooth picks to be glued into the right place.


Trace your template onto the card stock. Mine just happened to be big enough for a few banners on each piece.


Once you've got them all cut out, write the names of the plants on the side you didn't trace on. Then flip them all over and glue your tooth picks on the traced side making sure they are facing the right angle. Leave them a few minutes to dry.


Then you're done! Again, this is a cute project to do if you've got stellar handwriting. My normal handwriting is the bubbly print of a high school girl, but I attempted to do some cursive. Some of them came out okay, like this Sugar Snap Peas one.


Most of them turned out like this.


Or this. Clearly, I don't care if I use an "O" or a scribble for a letter.


But, they came out alright. These obviously wont really work in a garden unless you laminate them to prevent soaking them each time you water, but for seedlings you don't have to worry very much about the moisture.


What do you think? How do you mark your plants?

Thursday, March 29, 2012

Seedlings Planted!

That's right, over the weekend I finally made it to Home Depot, no thanks to that old to-do list, and managed to pick up some seeds while I was there. I managed to pick up the following:
  • Peat Cells (3 Packages of 32)
  • Vigoro Tomato and Vegetable Food (I'll admit I have no idea what to do with this, yet)
  • Miracle Grow Flower and Vegetable Soil
  • Vegetable Seeds:
    • Watermelon (didn't plant yet)
    • Roma Tomato
    • Big Boy Hybrid Tomato
    • Gourmet Blend Lettuce Leaf (didn't plant yet)
    • Black-Seeded Simpson Lettuce Leaf (didn't plant yet)
    • Green Onion
    • Broccoli
    • Sugar Snap Peas
    • Green Peppers
  • Herb Seeds:
    • Catnip
    • Italian Parsley
    • Oregano
    • Cilantro
    • Chives
    • Sweet Basil
I have no experience gardening, or starting seeds. I read a little bit about it online, but really, not enough to actually know what I was doing. I figured I'd just jump into it and see what ended up growing.


This was my set up. I don't know what the weather is like where you're from, but it was 30 degrees in Mass, and I did not feel like bundling up, so I grabbed a cardboard box, a little packing tape to make sure the bottom was all sealed so dirt didn't fall everywhere, my peat cells, seeds, spoon, and (not pictured) a small glass bowl.


 I filled each cell with one spoonfull of the soil. Some seeds said they had to be buried 1/4" from the surface, others were 2" so make sure you plan your soil accordingly! I lightly packed the dirt down with my fingers.


This is my photographic attempt at showing what the soil looks like with a hole in it for the seeds. I suppose if you're smart, you'll just follow the instructions for planting the seed however deep its supposed to go. I did a sort of mixed method where I put some seeds in the hole, then spread some out along the rest of exposed dirt, just so there more chance of getting them to grow. Or to smother them, I'm not really sure.


I was having a really hard time getting the seeds out of the bag and into my cells without dumping too many in one and leaving others bare, so I grabbed a tiny glass bowl to dump them into. It made it so much easier to distribute!


These are the tomatoes, you can see a few of the seeds are tucked away in their little holes, and some are spread out on the top layer.


Then I just topped them off with more soil, lightly packed, and spritzed them with lukewarm-ish water. Should the water be lukewarm? I don't know. I read on one of the prepared green house starter kits at Home Depot it should be for that kit, but I figured, it couldn't hurt my little seeds. Right?


And that my friends, is how I started my seedling journey. To those who are interested in perhaps starting their own seed adventure, here is how much mine cost:

3 Peat Cells (Package of 32): $7.77 ($2.59 each)
Vigoro Tomato & Veg. Food (3.5 lb): $5.98
Miracle Gro Flower/Veg Soil (1 CF): $3.33
Seeds: $15.19 (~$1 per pack)
Total: $32.27

Anyone else starting some seeds? Or a garden? I plan on posting a tutorial on how to make your own plant labels, and if you have nice handwriting (in comparison to my awful handwriting) they are super cute! Stay tuned!

Friday, March 23, 2012

Garden Dreaming

So I've been streaming old Jamie at Home reruns, and I've got to admit, it makes me pretty bummed to own a condo with small allocated gardens instead of a house with a yard. I've wanted to do a garden since I've moved in, but being lazy, I planted a whole bunch of flowers and watched them die. Well, I do have an excuse! The only hose that my unit actually has (I live in a town house) is at unit 3, literally, smack dab in front of his front door. It's like, 10" away from his front door. During the warmer months, of course everyone has their door open! It's just weird. I don't really feel comfortable lurking around someone's front door long enough to unravel the hose, bring it all the way to my yard, going back to turn it on, wrapping it up when I'm done. None of my neighbors are really on talking terms with us anyways, they are all rather unfriendly. Bummer.

Anyways, during our basement clean out I stumbled across my watering can and was reminded if I was less lazy, a garden would stand a fighting chance!


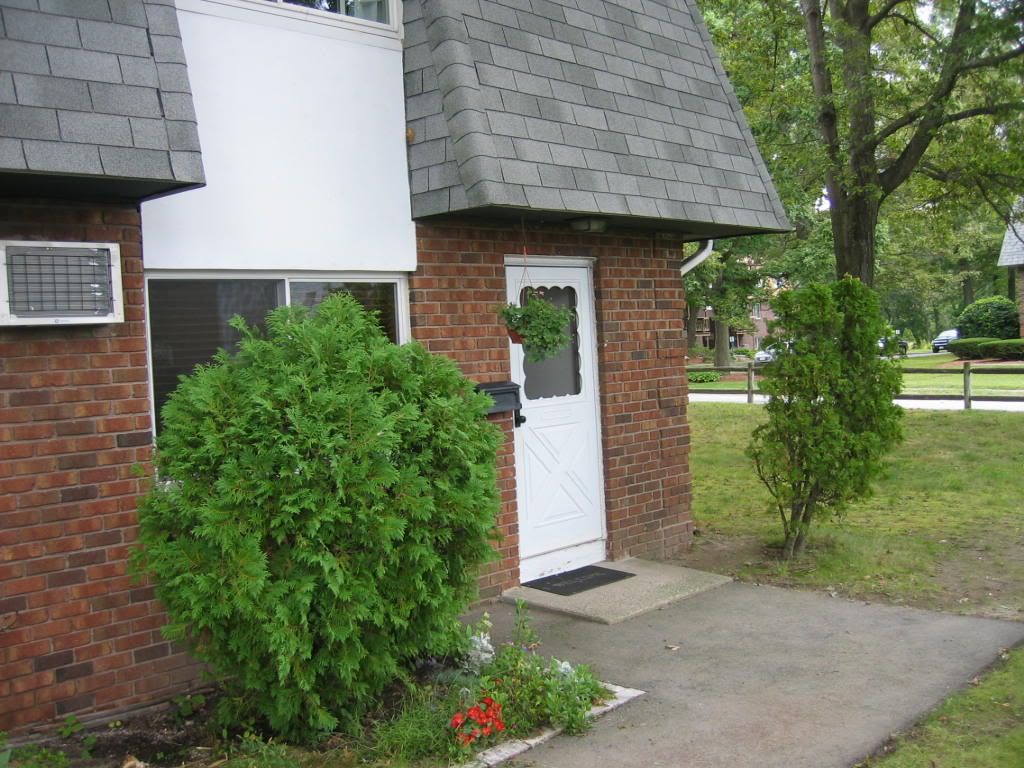
So this is our house when we went to view it while it was still on the market. Sometime in August, 2006. It doesn't look too bad, the little bush on the right side of the door is a little wonky, but otherwise not terrible.


This is the same poor garden last night, after a chilly but not snowy winter. Ignore the bag of peanuts, unlike sane people I enjoy encouraging squirrels to come around. I'm not sure what happened to this little privacy bush in front of the window, but he is NOT a happy camper. I'd love to rip up both bushes this year.


Wonky town is looking about the same, I think he's moving away from the house. This front corner of the house is also where we get the most water issues in the basement. As you can see by my amazing phone photography skills, there is a gutter/pipe there that's supposed to lead the water away, but it doesn't work as intended.


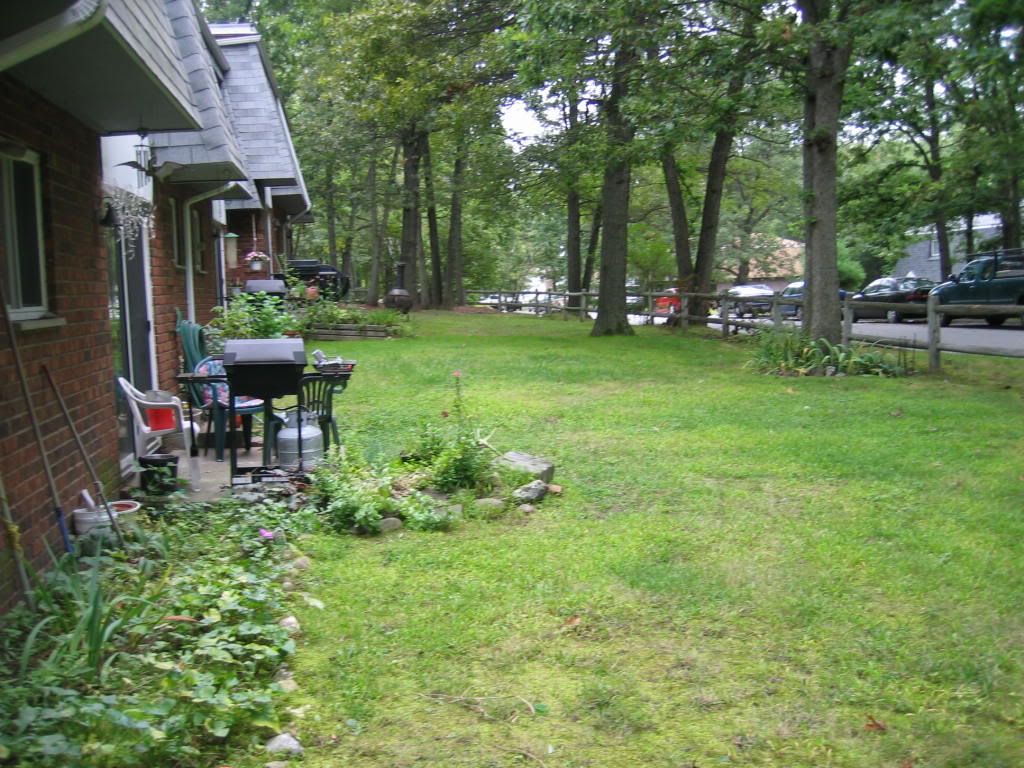
This is the best image I have of our back garden when we saw the house. This picture was just to show how much common ground is part of the condos, and our actual garden pretty much stops at the first window.


Annnd here she is today. We've never actually gone outside int he back. You know why? Our screen door has been broken since we moved in. Yep. Awesome home owners. I'm really looking to change that this year. Look at that light?! (Our condo association is actually responsible for fixing anything on the outside of the condo outside the garden plots.)


And this is the side of the house. Again, the condo association is supposed to maintain the window wells, clearly they have not. So this year I'd like to take things a little more into my own hands where legally possible.

 
Here's the game plan (using floorplanner.com). The trees and rocks are part of the common ground area, I included them so you can kind of visualize the area. This is relatively to scale, not 100%.


1.  Oak Leaf Hydrangea Pee Wee as a sort of "privacy bush".


2. Hosta Sum of All is a big leafy plant that I think just has the most gorgeous colours.


3. Anemone Sylvestris are short, sweet little flowers to keep near the front of the bed. How cute are they?!


4. Astilbe 'Peach Blossom' these should come to about the bottom of the window, and they have a gorgeous peach colour.


5. Front door inspiration from Pintrest (originally found here). I love the modern planter and the giant house number. I plan on doing something similar, putting a fern in the planter and finding a big ol' "1". Love this.


6. Hydrangea Limelight gorgeous, big flowering bush. Blooms almost all year long. I think this would look fantastic going around the corner of the house


7. I'd LOVE to do something like this hanging off that part of the roof that over hangs. I plan on planting lettuces, herbs, spring onions, and chives.


8. Tiarella 'Sugar and Spice' these are shade loving flowers. As you can see from all the trees we have around us, during the summer it drapes the entire space in shade. I want to plant them all along the side of the house to give it some colour.


9. Schizophragma 'Moonlight' is a vine. I want to put a modern climber near the second basement window for them to climb up, I think the bright white flowers are gorgeous, and will bring a little more interest near a small outside dining area.

10. I really want a small out door dining area. Some of our neighbors have one, so I figure it can't be against the bylaws so long as its close to the property, and doesn't impede much of the common grounds. I figure a small, 32" table like this set from Crate and Barrel:


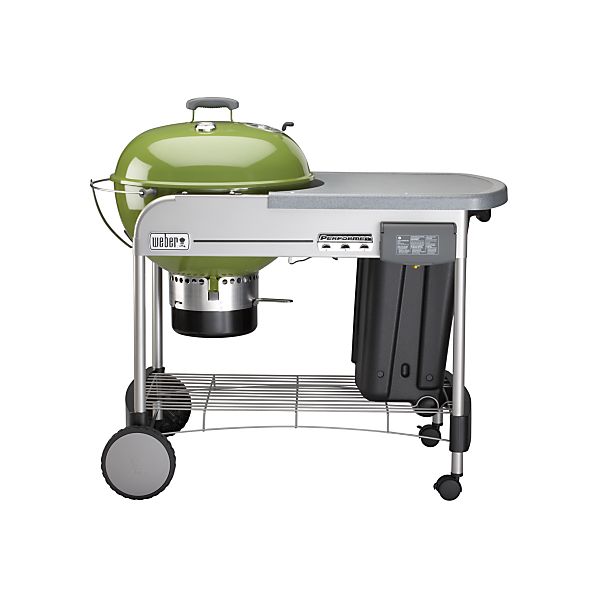
And this super cute charcoal grill (also from Crate and Barrel):

And I think we'd build a small prep table, something like this:


11. I plan on using two big planters to fill with herbs. Parsley, Cilantro, Basil, Rosemary, Thyme.

12-15. I want to plant an edible garden in the back. I'm thinking of (12) potatoes, (13) shallots/garlic, (14) onions, and (15) tomatoes. Things that we use every day. Depending on the space, maybe add some sort of peppers.

What do you guys think? Any plans on a garden this year?

Tuesday, March 20, 2012

Weekend Accomplishments

In honor of posting a to-do list, my boyfriend and I decided we'd get some things done that weren't actually listed. Don't get me wrong, we tried to do a few things on the list. Replacing the heaters seemed like a good place to start. We had actually purchased them on sale in the winter for around $50 a pop for the 6 foot long ones.


This is our living room heater. It's old, and grody. This is actually the second heater we worked on, the first being the one in the dining room. It was my intention of replacing the large 8 foot long heater in the dining room with a 6 foot one, so we'd be able to fit our hutch flat against the wall. We found out the power actually comes out closest to where the hutch is, so for this project we'd have to drill some holes in the wall, which we weren't prepared to do.  Back to this guy, the living room heater.


I'm aware you're supposed to take these apart and clean them. Clearly, we didn't. Gross.


After Victor removed all the screws attaching this bad boy to the wall, it popped right off without a problem. There was a bunch of black stuff behind it, which I was worried was mold. We think its actually some sort of burned dirt/dust? It came right off with a damp cloth, and pretty much smelled like potting soil.

This would be where I show pictures of us installing the new awesome heater that can be centered right under our window! That would be of course, if we didn't buy the wrong heaters, you know, in December. We have electric heating. The heaters we bought? For a hot water system. I think it's safe to say we're the best home owners probably ever (sarcasm).

We'll be heading to HomeDepot sometime this week (which we didn't do this weekend even though it was part of our list). Hopefully we'll be able to at least get a store credit, which will be fine since we have so many other things there we need to pick up. Talk about disappointing though.

Instead, we did a general clean up of the downstairs, ran a lot more stuff to the basement (including new blinds, a shelf system I bought from Ikea, and a bunch of other stuff that should've gone down there forever ago), cleared off our stairs, swept, vacuumed, and cleared out our entry closet.


This is the top of the closet before. Home to tools, power tools, oh, and more tools. Tools that belong in the basement, so that's where they are now. Hooray!


This is the top of the closet now. We kept one generic tool box here (which, if you'll notice, isn't in the before picture, because it was on the floor next to the couch...) some bungee cords, the box containing our floor spacers, and bed risers. Okay, so we're not perfect. Everything but the tool box should totally go in the basement. After seeing this image, I don't get why we left those there to begin with. At least its better, right?


And here's the bottom of the closet. I didn't take any other pictures of the stuff in the bottom because A. it's too embarrassing B. I'm forgetful and C. if I stopped to take more pictures I'd likely have taken way longer or not done it at all. Allow me to give you a quick run down of what I found:
  • Potting Soil, from when I actually worked on our garden, the first year we lived there (circa 2007)
  • Christmas wrapping paper, from two years ago
  • Winter shovel from two years ago (it only snowed twice this past winter, totally didn't need it here)
  • My prom dress shoes, from 2003, and my senior dinner dance shoes, 2004
  • Retro video game controllers in the white box there. Including the NES Zapper...
  • White trash bag with two different pairs of slippers
  • TJ Max returns from Christmas two years ago (I'm seeing a pattern...)
  • Some door hardware
  • Lots more shoes that don't fit, and probably haven't fit since 2007
About 7 pairs of shoes went to donation. Including a NEW pair of men's 16.5US sized Nikes. I should mention here I've never met someone who wears a size 16.5US men's shoe. And the prom shoes. Oh the stuff we hold on to. 3 pairs of shoes were missing their mate, so in the trash they went.


Here is the bottom of the closet after. The shoes we did end up keeping went upstairs to the bedroom closet where they belong (I think we kept 4 pairs?). Looks a lot better though. We can actually shut the door now too. I think that's the first time it's actually been able to shut since we moved in.

Maybe over the course of the week, or this coming weekend I'll actually get something done on the to-do list...

Friday, March 16, 2012

Get On That Already!

I haven't posted in a while. We've been in a sort of lull between work (as most lazy people do) so we haven't been getting a whole bunch done. Hoping to change that this weekend! I've got a list going of things I'd like to accomplish.

  • Replace the living room and dining room heaters. Our current ones are old and disgusting. Replacing them AFTER Winter is, of course, the best laid plan. Who replaces them before they use them? Psh.
  • Clean out and reorganize the bathroom. Last time I did this was last January, but this will probably a life long project. 
  • Clean out and reorganize the bedroom. We desperately need to get a new mattress but can't even get it in there until we clear out the extra stuff  in this room.
  • Finish clearing the pile of trash in the basement. Yes, its still lurking there. 
  • Clear out the stairway and begin removing the carpet. 
  • Hit up Home Depot
    • Return Sump Pump
    • 1 gallon of Behr in "Silver Sateen" (for office)
    • Template for Cabinet Hardware (for knobs for entertainment stand)
    • Wall/Floor Scrapper (basement)
    • 5 gallons of Drylok in White (basement)
    • Polyester Roll/Brush to apply Drylok

Friday, March 2, 2012

Under the Kitchen Sink

Another snow day means another organization project! If you're from New England, I'm sure you got dumped on yesterday just like me. Nothing like some snow, then rain, then more snow, then digging your car out of 4" of ice! Well, I decided to take the time to clean out under our kitchen sink. A few years ago (yes, years) I accidentally flooded my kitchen. Apparently I left the kitchen faucet running over night, and the sink was so full of dishes that the water just cascaded off a plate near the faucet, onto the counters, the floor, into the half bathroom. Water was everywhere! It was horrible. We cleaned up the water everywhere, except I never actually emptied the cabinet under the sink, where the water sluiced down and into. Again, sometimes I wonder if I'm insane and not fit to live on my own.


This is pretty much what I started with. I had already started taking plastic bags out (yes, this is pretty much an in progress shot, not straight from the beginning... how sad!). We keep grocery plastic bags to clean the kitty box, but as you can see they got pretty out of hand. No one needs that many.


I started out by simply just taking everything out. I came across a few things that shouldn't have been in there in the first place; raid, motor oil... Then I got rid of all the bags, trash, expired cleaning agents.


This is what I was left with. A lot of rust stains and melted dish washer tablets. I surprisingly didn't find any mold except for on some cloths that were kept in the back for polishing our dining table. I also didn't find any scary bugs, which I totally expected.


I took the razor blade I use for cleaning my ceramic cook top and scraped the whole thing down (not hard enough to ruin the cabinet) and everything came off easily. Then I just took some of my Mrs. Meyer's lemon verbena cleaner, gave it a good spray, and viola! Its like a whole new cabinet.


I had a few Dollar Tree baskets kicking around, so I loaded one up with sponges, clothes, Swiffer pads, steam mop pads, and the like, and the other contains the actual cleaning supplies. How awesome is this?! $2 and an awesome, useable space for my cleaning supplies.

Anyone else have a snow day? Any organizing projects lately?